|
When it comes to dabbling in video game hardware, there's always a first... And for some people, it begins with something very, very simple. We here at µ64 don't have any problem with that, which is why we have an entire guide dedicated to showing how easy it is to install a new control stick in your official N64 controller! Most likely this guide will be for people who have bought one of those GC-Style Control Stick replacements, which we have a review about here.
First up, here's a list of tools you'll be needing.
- An official N64 controller
- A replacement control stick module
- Two different sizes of flatblade/phillips style screwdrivers
- Some way to store screws and keep unique ones separate
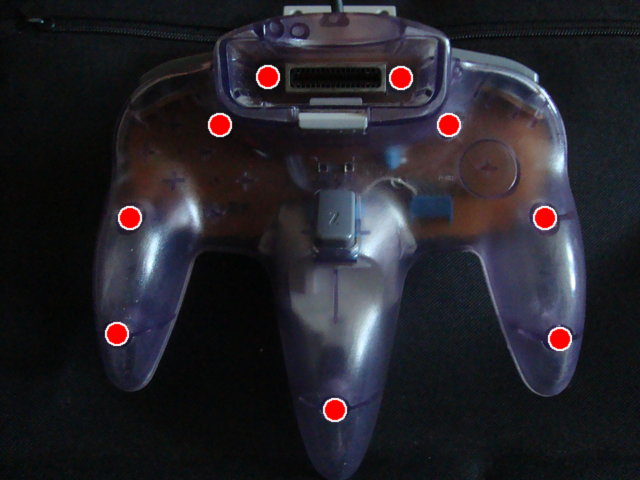
Like most game hardware, it has to be flipped over so the screws can be accessed. So turn that controller over as shown below. The screws needed to disassemble the shell are highlighted in red:
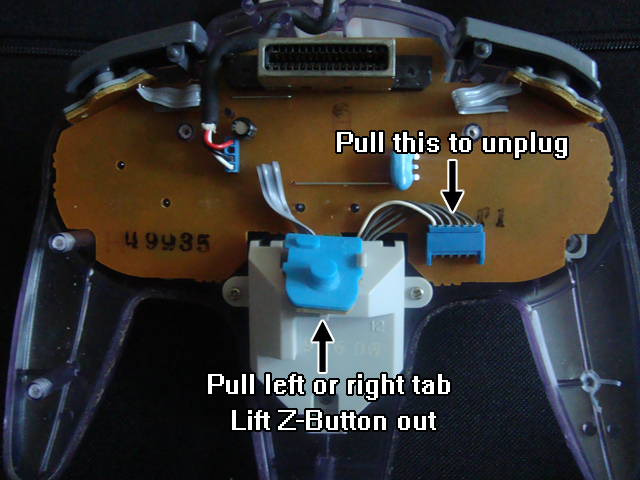
Once you've got all the screws removed and left in a safe place, you can lift off the bottom half of the shell. Nothing is gonna snap and fly across the room or anything. The L and R buttons may stick to the bottom shell but they are easy to put back, use the following picture as a reference. The main focus here though, is to remove the Z-Button pad and the little blue plug. The picture below describes it pretty nicely.
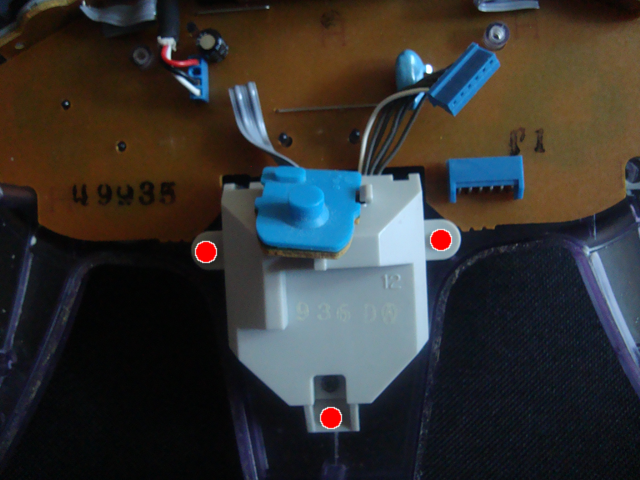
Once you've got the blue connector and the Z-Button removed, it's time to unscrew the old control stick module. Only unscrew the shiny screws, ignore the black one. The picture below shows you which screws to remove if you're not sure, with red highlights as before. (and yes, I know the Z-Button is still there)
Now, with the old control stick module gone, you can pop in whatever brand new stick you're probably dying to use. The re-assembly of your controller couldn't be simpler, just follow the guide in reverse! Install the 3 shiny screws, then plug in the module (try testing the controller right now to make sure the stick works!), clip the Z-Button back onto the module and then just screw the shell back together. Don't forget to make sure the L and R buttons are in place as well. Now you now have a controller with a fresh new control stick! I hope this guide was helpful to you, happy gaming!
Written by Aaron Wilcott
April 29 2012
|